Pages

Proverbs 31 printable

Saturday, April 30, 2011

I've been meaning to switch out my framed valentine print that I've had in my kitchen for something else, and finally this afternoon I got to that. On Wordle.net I put in a bunch of words from Proverbs 31. 

I'm really loving those three colors lately :)  

What a nice reminder as I wash the dishes!


If you'd like to print it for yourself, just click the image below and it will take you right to wordle.net where you can print it off or do a screen shot to save it to your computer. 


Wordle: Proverbs 31


Planting Geraniums on a gorgeous day!

Friday, April 29, 2011

Warm Warm Warm outside!
Sun shining bright!
 Oh it was a gorgeous day, I tell you!
{and NOT because of "the royal wedding"!}

I love today! 
The sunshine and warmth make me feel so happy and giddy. I've never noticed the difference in feelings that the seasons bring until I moved out to Canada. The beautiful spring-like days really do lift my spirits. 
Today there was a sale on little geranium plants at Canadian Tire, and I've been planning all week to get some. I bought two pink ones and a couple pots and spent the afternoon out on our balcony. 


... maybe I should get some gloves 


First time wearing shorts outside since last summer. 
Ah.. this weather really makes me happy

{even my hair's spirits are lifted!} 


Enjoy your beautiful weather wherever you may be.
And don't get too busy to stop and smell the... geraniums?? 


Omelettes

Thursday, April 28, 2011

Omelettes are a simple and quick meal I like to make when we just want a light lunch or dinner. 


Crack a few eggs and mix with a fork- 4 is perfect for the two of us.
Mix them up with some milk.
Cut up little pieces of onion (ew, my onion looks weird!).
Cut up some ham pieces.
Grate some cheese.
Add everything to the bowl of eggs and mix up.

Dump egg mix into sprayed pan.
I usually do half of it at a time.


I can never turn mine over nicely, so I just try to flip half over the top (like a taco shape), but most of the time I just flip it any which way it wants to go! Lots of chunks of egg-y goodness :)

haha, it doesn't even look like omelettes! :)
But it's still yummy and we like it.


I made some biscuits to go with it.


Just a simple easy thing we like to do.

Ice Cream Sandwich Cookies


Y.U.M!
Ice cream sandwiches are the best thing ever! .. well okay, I'm sure I could easily find something else that beats them, but when it comes to ice cream, there's pretty much nothing else that tops it for me. 
I found a recipe for butter-less chocolate chip cookies the other day and I wanted to try it out and see it how good they'd turn out. Well, they turned out pretty alright if I do say so. Hubs liked them. 
I made them big and fat! So they're giant ice cream sandwiches! YES!


Add some sprinkles!! 

What a fun treat for a little get together, or party :) 
I love collecting simple food and snack ideas and storing them away for special things. 

Now... I'd like to go take a bite out of one of these babies!

Recipe for 
Butter-less Chocolate Chip Cookies
2 1/2 cups flour
1 teaspoon baking soda
1/2 teaspoon baking powder
1/2 teaspoon salt
1 cup vegetable oil
1 1/2 cup brown sugar
1/2 cup white sugar
2 eggs
1 teaspoon vanilla
1 teaspoon almond
2 cups semisweet chocolate chips

Directions:
Preheat oven to 350 degrees.
Combine flour, baking soda, baking powder, and salt and set aside
In a mixing bowl cream together oil, brown sugar and white sugar. Beat in eggs one at a time, then add in the vanilla and almond extract.
Blend in dry ingredients and fold in the chocolate chips.
Bake for 8 to 9 minutes and then let them cool on the pan before moving them to a wire rack.

Recipe found at Sugar and Charm Blog


Pom Pom Flowers

Tuesday, April 26, 2011

I'm such a sucker for simple cuteness.
Like these pom pom flowers!


After seeing someone's tutorial on pom pom flowers I decided to finally make my own.
They're a little shabby looking :) I hot glued them to little twigs I collected outside, and put them in my thrifted vases (I picked these up on 2 different shopping days and 2 different stores. I think they're cute).

White yarn would be so cute- like little dandy lions you like to pick and blow when you're kids! .. And your dad yells, "hey, don't do that! I don't want more weeds growing on the lawn!"


My table runner is just a piece of fabric I found at the thrift a while back. I used a piece for framing in my wall collage. And I think I'll cut to size and hem this piece to make it a more permanent table runner. I like the colors and pattern. 
And I also love the green ivy plant on the table. I love how the green looks with the blues and the brown of the table. Pretty colors. I got the ivy clippings from a lady at church. I love having plants in the apartment. The greenery gives it a pretty, healthy, and fun feeling in here. I'd like to plant it later and hang it in a corner somewhere.


Anyway, pom pom flowers! 
ta-ta!


Time Wasters

Monday, April 25, 2011

Ran across some little sites 
that made me laugh


(this is one I've found and tried before!)


(all I have to say is .. Oh my goodness..)


That's all folks.. I got bored looking at all these on this one blog I was browsing through. 
Have fun, just don't waste too much time ;)


Homemade Choclate Syrup

Monday, April 18, 2011

 Ugh, I despise the dying-of-hunger part of being sick.. When I get the flu I can never eat much at all for like 3 days and my poor tummy cries "feeeeeed meeee!" Any time I'm sick I always crave fast food hamburgers and fries! So that's what I got last night after hubby came home from work and I ate most of it :) But today nothing was just tasting good at all, so I didn't eat. Then I thought, "hmmm, I can usually eat ice cream any time.." We have vanilla ice cream, but vanilla is not my favorite and it's kind of too sweet. Hmmmm..

Solution to plain old vanilla ice cream when you're more of a chocolate person... 

Homemade chocolate syrup!!! 

Ingredients:

1/2 cup cocoa powder
1 cup water
1 cup sugar
1/8 teaspoon salt
1/2 teaspoon vanilla


Put all the ingredients expect for the vanilla into a pot and mix together.

Cook for about 8 minutes on medium heat.
Keep stirring the whole time.

 After 8 minutes, remove pot from heat and stir in the vanilla. 

Let the syrup cool off for a while.

Then you can pour it into a jar or other bottle .


 I used my Heinz chili sauce bottle that I had saved 
{I save all my glass jars and bottles- isn't it a neat one?}

Like my homemade funnel??
I cut the top of a 2 liter soda bottle a while back. Works fine!


 Then I put it in the fridge! 

... And came back later for an attempt at eating something for once today.

I drizzled some chocolate syrup over my plain ole vanilla ice cream!  
{It didn't seem to thicken up yet. Maybe it will the longer it's in the fridge}


But then I decided I'd rather make it a shake.. 


Y.U.M 

I ate it all! ... but then I felt kind of sick. 
It's time for this flu to leave the house.

Anyway, enjoy!

Free prints

Sunday, April 17, 2011

I've been down with the flu for the past few days.. I got it from my husband. That's the wonderful thing about being married- we're the first in line for each others sicknesses! So the past few days have been spent laying around the house, playing on the computer, or watching tv shows. Well, I feel like blogging about something.. so hmm... what could I post? ... 

I thought I'd offer the two prints I made on picnik for my wall collage. 
{If you haven't seen my wall collage, check it out here- I love it!}


I'm not too sure of exact sizes, but they're in between 4x6 and 5x7. 
When I printed them from our printer at home I just uploaded them into a Word document. 

Anyway, if you're interested.. I think you just have to click the pictures and save them to your computer. 
Hopefully they work out fine. 


Now back to my sniffles and coughs


Cake Balls

Friday, April 8, 2011

Oh. My. Goodness. Gracious!
For the first time ever I made cake balls. My husband's birthday is today, but we celebrated it yesterday since that was his day off. I've seen cake ball posts everywhere, and they are so cute, but I was never interested in making them. Then I ran across this post and was inspired!

How to make Cake Balls

Get a boxed cake mix 
I bought a spice cake mix, and I also made a chocolate cake, 
but from scratch.. since I had everything on hand for that anyway.


Mix & bake your cakes as normal
Bake in 9x13 pans. 
Let your cakes cool for a few hours. 
Then when cooled completely... 

Crumble the cakes up 
First, while the cake is still in the baking pan, start cutting the cake sides/edges away because we don't want any hard cake pieces. I ended up having to also cut away the top layer of my chocolate cake because it was a little hard.  


I cut them up in squares and put them in a bowl, and got another big bowl to crumble them up into. 
Just break them apart and make lots of little cake crumbles! Kinda fun ;) 

After your cake is crumbled...
Add 1/2 a container of cream cheese frosting
If you're making two cakes one is all you need! Perfect!


now roll up your sleeves, it's time to get messy!

Mix & mush it all together well
Yes, with your hands! It's great fun. 
 

Once all mixed... 

Scoop and roll into balls
You could use little ice cream scoops, but I just used my Table spoon measuring spoon. I scoop out a full scoop, then added some more. So maybe a table spoon and a half of another. But whatever you like!


Place cake balls onto a cookie sheet
You can use wax paper to place them.. I didn't have any. 
Put your cake balls in the freezer for a few minutes. What I did, was put about 6 or 7 cake balls on a sheet, place it in the freezer, and worked on another sheet of 6 or 7. 

Then...

Cover cake balls in melted chocolate 
I used white chocolate and milk chocolate melting wafers/moulding chocolates... 


.. and melted them by using my candle warmer! 
Much easier, I'm sure then using a double boiler on the stove top.
It's perfect.


Plop your firm-from-the-freezer cake ball into the melted chocolate and get it all covered. 
I found it easiest to use two forks (holding them as you would when tossing a salad) for lifting them out and holding them up to drain the excess chocolate off.


 Then place onto baking sheets. It would be best to use wax paper for this, because they do stick to the pan and when you try to lift them off the bottom tears off. So I put down some tin foil. At least they didn't stick and get ruined. *little tip: I was noticing that my cake balls were cracking after the chocolate was set on them. I think they were way too cold coming right from the freezer into the hot chocolate. So I started waiting several minutes after getting them from the freezer, and putting them into the chocolate.*

Add sprinkles or other candies
This part should be done when you plop your chocolate coated cake ball back onto the cookie sheet, when the chocolate is still wet. I used sprinkles for some of mine.

After finishing that baking sheet of 6 or 7 cake balls, I was putting them into the fridge. But then I checked online and I read that they don't need to stay in the fridge. An air tight container would be best, sitting out on your counter in a cool area. So that's what I did. 
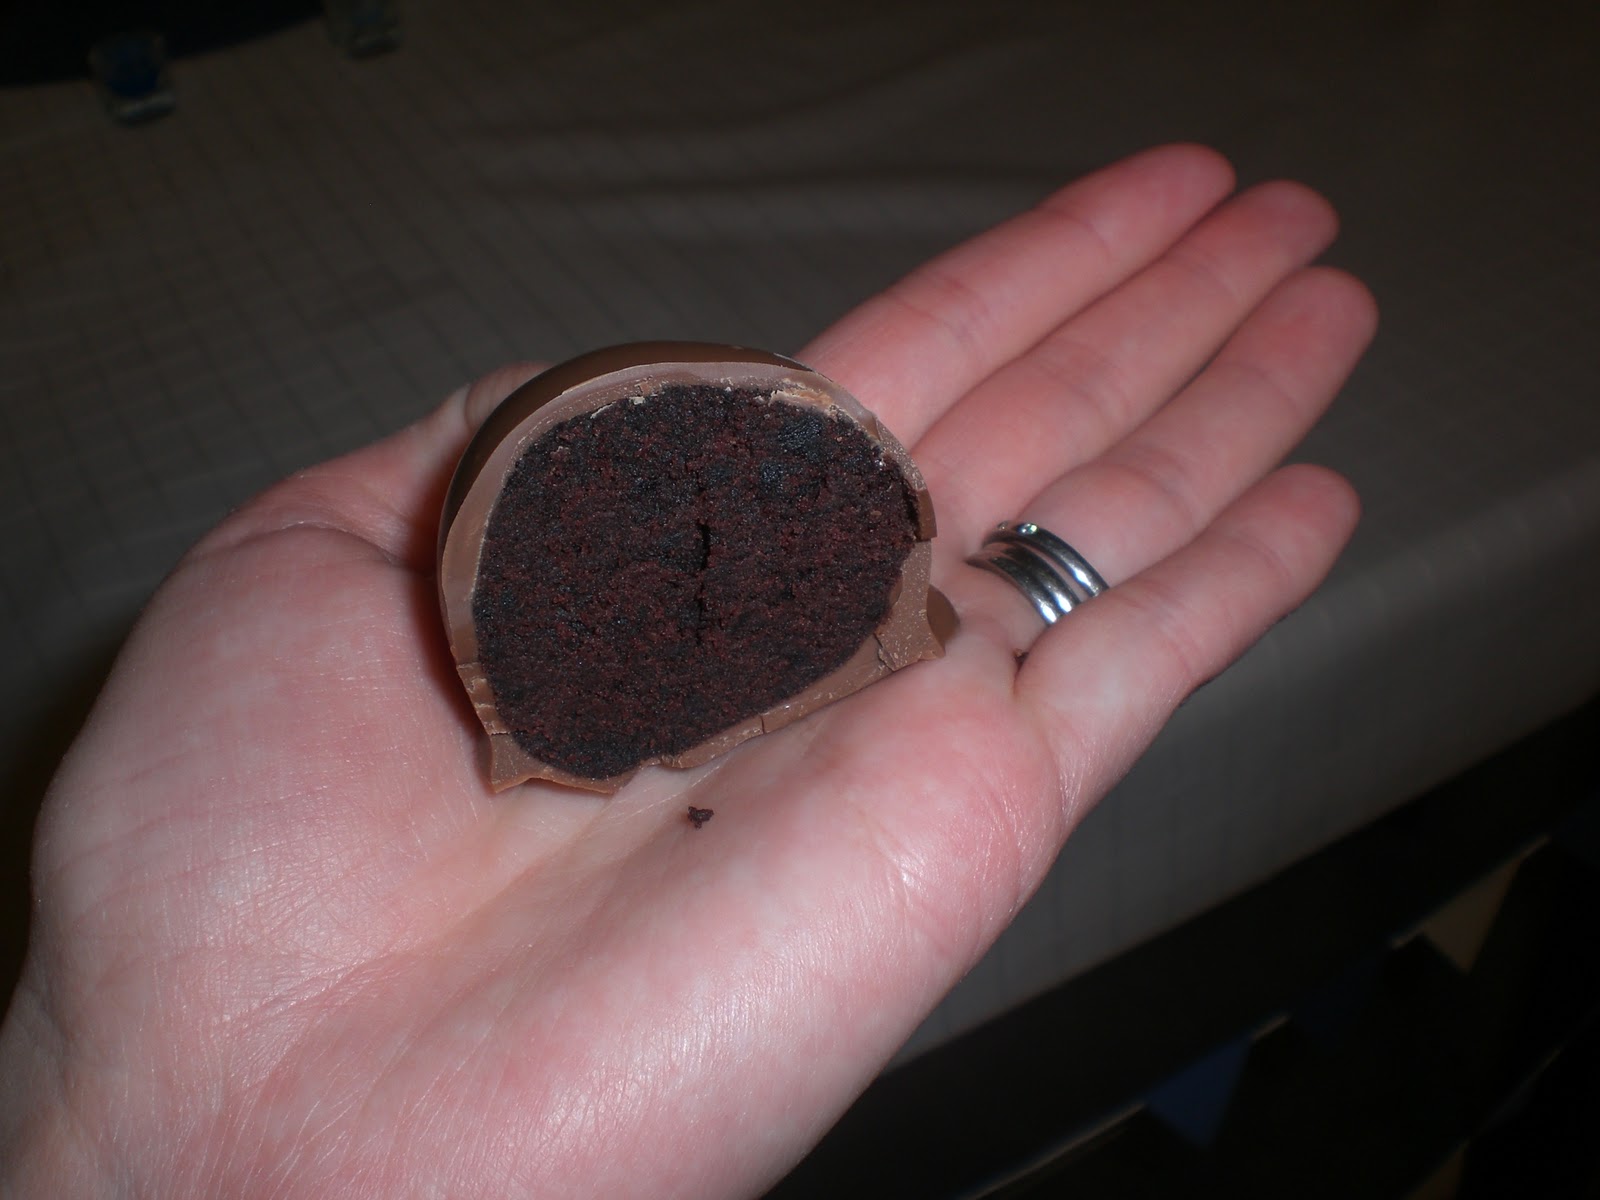
Admire your work!


The chocolate ones were AMAZING! 
They both were amazing, but the chocolate was my favorite.


Aren't they just so adorable?!
These are SO perfect for parties, baby showers, you name it! 
I can see myself making these many more times for special occasions.


Y . U . M
It's so much fun to beautify foods!