Pages

Cake in a Cup

Tuesday, March 29, 2011

You want some cake, but without all the mess and hassle (okay, so it's never really messy or a hassle- I use boxed cake mixes usually!) But still! Here's a fun and super quick way to make some cake.
Cake in a Cup!!


Grab the biggest microwaveable mug you have in your cupboard and fill it up with these ingredients:

1/4 c flour
1/4 tsp baking powder
4 tbsp sugar
2 tbsp cocoa
1 egg
3 tbsp veggie oil
3tbsp milk

Add the dry ingredients first and stir. Then add the egg, oil and milk and mix well. I used my mixer with just one of the beaters. Then pop that mug right in the microwave and set it for 3 minutes on high. {I didn't even check to see if mine was microwave safe!! haha}

And that's all there is to it! It was SO fast! 
I added vanilla cake frosting to mine, and it was yummy! .. We're having dinner in about an hour, so I painfully decided to set my little cake aside and wait for later.. and maybe, just maybe let my hubby try some {wink}.

This would be such a fun, simple, and cute dessert to do when having company over! Hmmm, I think I have just the event in mind I'd like to make this for! 

Enjoy!!! 
{just don't spoil your dinner like I kind of did!}

Recipe found from here


A Collage Wall part 1

Tuesday, March 22, 2011

Yes, I'm attempting my first real wall project since being in our apartment. These kinds of decisions always drive me crazy! Anyway, last week we got rid of this huge tv stand hutch thing that we've had since we first got married. I was SO excited to finally be getting rid of it! I had it listed on Kijiji for a couple months but no one wanted to buy it, and I kept reducing the price too! .. down to $15!! Still no takes! "THAT'S IT! I'm listing is as F-R-E-E!" ... what do you know, ten minutes after I post the add I get 6 emails of people wanting it. Oh brother.. who cares though, it's G-O-N-E! Okay, yes I'm getting to the point of my post. So with that huge jalopy gone we have more space and I've been able to rearrange my living room the way I want, which is so much fun.

Here's my wall I'm attempting the project on


Excuse the untidiness. I didn't feel like making it perfectly presentable for the picture. 
So this is my sad naked wall that needs some love. I have a collection of frames that I've been grouping on the floor in different arrangements, looking for one that jumps out to me. 

Here's the last grouping I tried, and I think I might actually like this one.


My frames are not as much of a variety as I was hoping for.. But awhile back I got this bag of like 12 frames (8x10's and 5x7's) for $5! And some others I found at thrift stores. They'll all be painted once I figure out what colors I want and such.. which is such a hard decision for me. Our living room is not exactly matching in any way. It's a bit of this and that. I think painting them all black might be a bit too .. dramatic or something. I want a lighter look, and I REALLY want some pretty colors. I plan to fill the frames with photos of the Hubby and me, pieces of attractive fabrics, and some other things that I'll have to think up. 

I'd really like some suggestions with this project, because I'm not that great with putting things on the walls. Putting things on the walls is the scariest and most intimidating thing for me!

I used a word document to open up my living room picture in, and I added shapes on the wall for the frame grouping. 


And here's another one.. 


This is pretty much the same layout, but I just added another 4x6 shape near the bottom in the space. The space made it look a bit off balance. I think. I'll have to go find another 4x6 frame if I go with this one. I guess this would be an oval layout? Right?

So what do YOU think?? How would this look on my wall? Would it be weird if I painted some of my frames white, since my walls are white? (not all the frames, just a few). Share some tips with me! I'd love to hear what anyone has to say for this project, cause.. I'm scared!!!

Owl beanie

Wednesday, March 16, 2011

Well, I've decided to rename my blog to Homemakin' & Crochetin'!
{just kidding}
I'm so tickled pink to show my newest project!! 

A little itty bitty owl beanie!


Eeeeeeek!
Did I really make this????


It's so tiny!


I already told Hubby that I'm keeping this hat for our own baby .. someday.
I followed this pattern for making up the beanie. There's a pattern for 3 months old, and also one for newborn. I made the newborn one. After searching forever, I finally found brief instructions for the beak.. it's really hard to find instructions for tiny triangles. And I'm not exactly able to figure out stuff like this on my own! That just doesn't work yet. For the eyes I knew how to make circles already, and I found instructions for making the oval ears.

Oh, and the Cosby Show kept me entertained while I worked on this little guy :) What a funny show! They just don't make shows like that on tv anymore! Love it.

This really wasn't too hard of a project. And I used barely any yarn. The one thing I found difficult and frustrating was that the hat is done is double crochet stitches. For some reason when I come to end each round of the circle with a slip stitch I find that it just doesn't look all that right. Just before turning my work it calls for 3 chain stitches, which the right number of stitches for the height of the double crochet.. right? But when I go to end with a slip stitch it looks as if the 3 chains is too much because it puckes .. I don't get it. Anyway, I just to need to figure out what I'm doing or something. I like the double crochet stitch, but for circles it doesn't look right when I do it. There are either gaps or something..

Until next time..

happy creativities!


My first beanie!! Teddy Bear style!

Sunday, March 13, 2011

See him???? 
Isn't he cute and cuddly????


This is my very first crocheted hat!
A friend of mine is having a baby shower and I have been trying to decide if I wanted to attempt making a gift or just buying something.. As you can see, I gave into the challenge of trying out this intimidating project!


My gift is themed, can you tell?? Who doesn't love teddy bears, right?! 
Teeny teddy bear slippers, a stuffed teddy bear, teddy bear bib not pictured, and of course the little bear beanie! .. all going into a cute teddy bear gift bag.


Ahhh, the feeling of accomplishment floods my soul.

Can't wait to give her my gift! 
.. I hope it fits!! 


Scarves for my mom and sister

Tuesday, March 8, 2011

My mom should be getting a small box in the mail any day now. 
Last month I made my mom and my sister scarves, just like this one I made for my self. I was really loving these scarves and just knew they would love them too! Now I doubt either one of them will be checking out my blog any time soon before their package comes, so I think it's safe to blog about this and show some photos. Actually, it's not even a surprise- they're expecting these in the mail! And they even know the colors, but I didn't want them to see before they arrived! 

So here they are all finished. I think it took me a total of 3 days to gets these made! Seriously, they are so quick to make, and I even make changes, adding to the original pattern to make them wider and a bit longer. They are so much prettier than the pictures are showing!


All packed and ready to head out to California!! 
... wish I could have gone with them! 


I was pretty excited that it only costs me $8 something to mail these! 
Maybe that's expensive to you, but I live in Canada :) 

I hope they LOVE them!

Picture frame to Hair clip holder

Monday, March 7, 2011

For my cute little hair clippies, I thought I would make something to keep them together and displayed pretty.

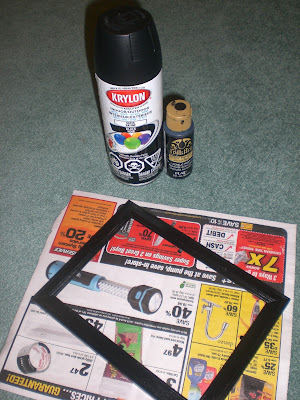
Used acrylic paint first, then spray painted my 5x7 frame for a more even look. I couldn't get in all the cracks of the frame's design that great with my sponge brush.

Hot glued skinny black ribbon to the back sides of the frame, and then pulled the ribbon across the front side and glued it on the back of the other side (hope that makes sense). The ribbon is so skinny, so I used two pieces of ribbon on each line to make them wider just a little bit.

Dumped out my button collection and picked out little black buttons.. 

and glued them onto the ribbons to use as dividers for the hair clips. Why? Well.. hehe, because the clips kind of slide down the ribbon because it's so skinny. 

Ya, this is nail glue! haha! I ran out of my glue stick in the middle of this project, so I went scrummaging around for super glue, but didn't have any, and I remembered I saved this from my attempt to have pretty fake nails for Valentine's (didn't turn out so hot) ... I just knew I would probably need it for something!

See how I did the ribbon? It's on the outside and around the frame part? 
Oh ya, I cut out some scrapbook paper to fit in the frame. I picked black and white because of the striving-for colors of our master bedroom! {I've mentioned them tons of times..}

And it's all finished and ready for some hair clips!

My Hubby is so encouraging.
He said, "It looks like a prison cell."
 
He made me laugh. 


All decorated with my little homemade clippies... 
I think the only ones I've actually worn so far are the brown crocheted flowers!


I'd really like to start making up a bunch of fun hair clips to sell during the summer or fall time with another crafty friend. And I had the thought last night about making up some of these hair clip holders to sell as well.. Hair accessories and holders! Lots of fun colors! .. My mind was just going last night. 

What do YOU think???

Flowers in her hair..

Sunday, March 6, 2011

Hi! I'm back with more crochet stuff to show off. Atleast my last post wasn't about crochet!.. Gotta take a breather here and there. Last night I was making some more of those cute little flowers that I learned from Little Birdie Secrets and used my smaller hook and got smaller and cuter flowers. Awwww.. they are so cute and little. Tonight I made a couple of them into hair clips. I hot glued little pearl beads on the tops, and hot glued clips to the backs.


I loveth them. 


I know they're not a "WOW" but they're just enough for me!
And I think I'll wear them to church tomorrow... er, .. today, 
since it's already,.. oh never mind, you don't need to know! {wink}


Dollar store pillow covers

Friday, March 4, 2011

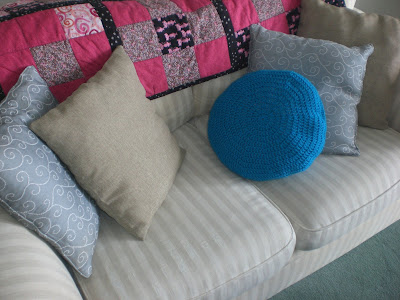
It's been weeks and weeks since I've been to one of my favorite stores- the dollar store! So today seemed like the perfect day to go! I had just seen a blog post of someone turning a placemat into a pillow and of course I wanted to try. The placemats I found weren't very comfy feeling or soft. But I did find some cushion covers! So I picked out two matching colors to redo the ugly pillows that came with our couch. I just used the stuffing inside the old pillows. The covers on them were hideously stained and nasty. 

So here I am trying to make our home life prettier..

New pillow covers..

 Old pillows and stuffing... 

Ripping apart old stuffing into pieces... 

Stuffed new cover with old stuffing! 

It might not all match perfectly {and nothing really does in our apartment!}, but I think our little couch looks more comfy, clean and inviting.


It's so nice to be rid of those old stained up pillows! 


Oh, here's the left over mess... 


... and into the T.R.A.S.H it goes!